RecyclerView animations - AndroidDevSummit write-up
RecyclerView Animations and Behind the Scenes - One more time we’re going back to this presentation. It’s a fact that list views (or more generic - collection views) are the most common used view patterns in apps, across all mobile platforms. So that it’s very important to know them as well as possible.
Today based on AndroidDev Summit presentation we’ll look closer at RecyclerView items animations.
Default Animations in RecyclerView
By default for basic operations like adding, removing and changing items SDK provides us those animations:
- fade in and fade out (for adding and removing items)
- translate (for shifting remaining items to the right positions)
- Cross-fade (for particular items updating)
All of them are provided by DefaultItemAnimator class which extends RecyclerView.ItemAnimator and is used as default item animator in RecyclerView.
If you’re interested in how it works under the hood I recommend you to check its source code: DefaultItemAnimator. It’s only ~600 lines of code which are very descriptive and clear.
In very short explanation it has two main steps:
- Prepare each of the item animation and put them to ArrayLists of pending animations.
- Play all of them together.
Based on app example, let see how it works for delete animation:
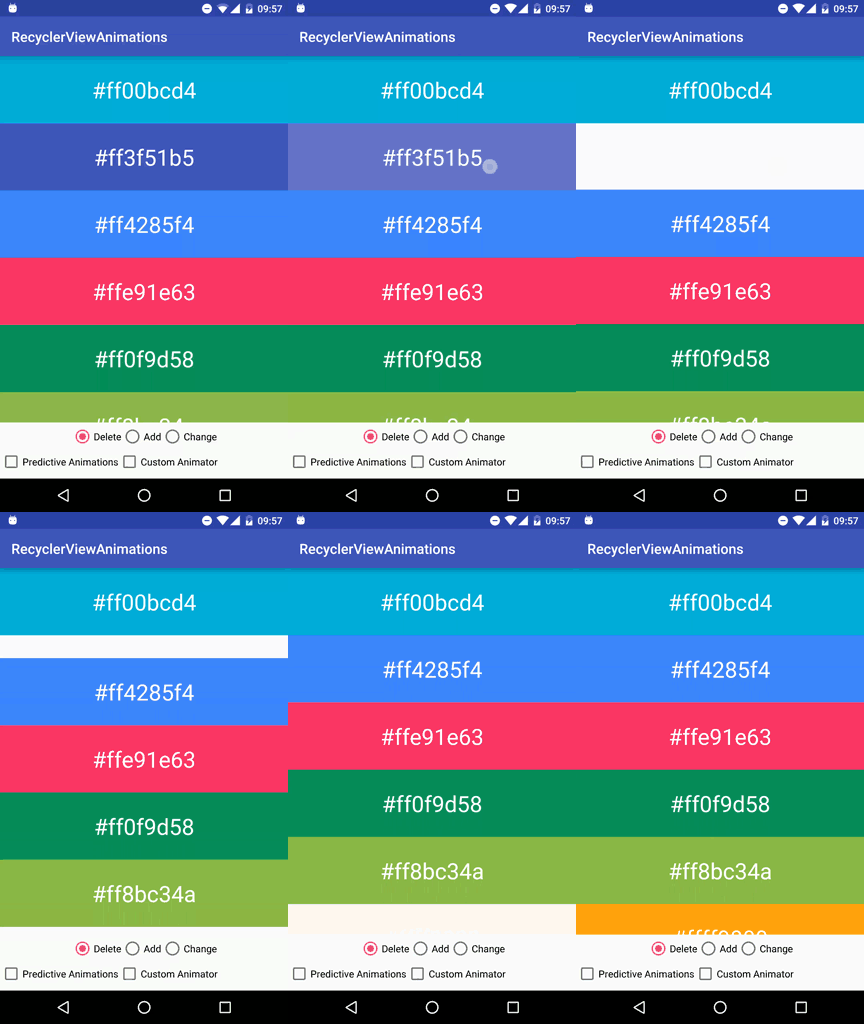
(steps 1-3 can be performed in different or mixed order)
- Prepare “add” animation (for item which is not yet visible but should appear on screen when there will be more room)
- Prepare “delete” animation (for clicked item)
- Prepare “move” animations (for all items which should be shifted to the right place)
- Play all those animations (with a bit more logic like e.g. delaying shift animation until remove animation will be finished - check ViewCompat.postOnAnimationDelayed() for details)
PredictiveItemAnimations
While from user experience perspective it looks pretty straighforward, from implementation side there is one thing which we should care about - animating items which are not yet visible on screen but should appear after we perform add/remove operation.
We have to remember that technically only items visible on screen are live and exist in RecyclerView. So in case which we described earlier (remove item operation) the most bottom element was not shifted because it hadn’t existed before. In this case we should play appearance animation…
Or
We can predict where this element comes from. It is worth recalling that RecyclerView.ItemAnimator is responsible only for animations between starting and final state of view. Responsibility for views positioning lies in LinearLayoutManager (or any other RecyclerView.LayoutManager class).
LayoutManager has public method supportsPredictiveItemAnimations() which by default returns false value. Setting it to true when we’re sure that our LayoutManager meets requirements will help to play shift animation instead of appeareance one. And yes - LinearLayoutManager does support it.
In our code we’re enabling it in this way:
Results are visible here (look closer at the last element which is shifted from the bottom of the screen):
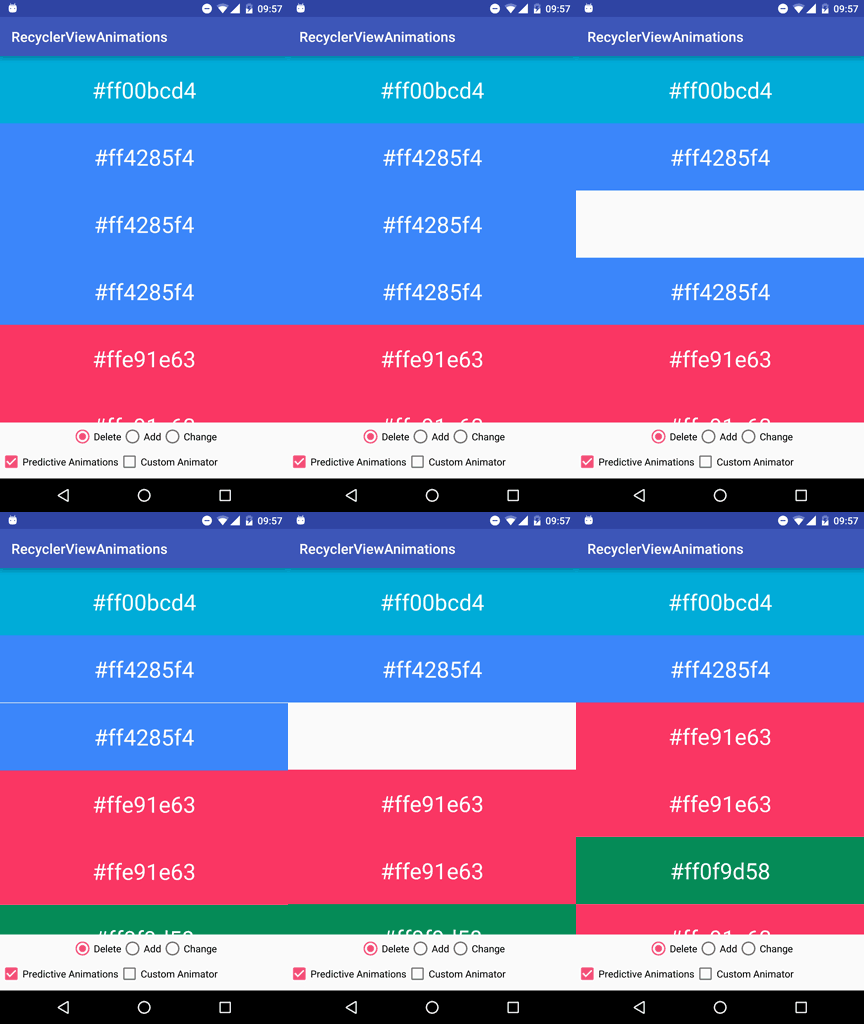
If you’re interested in how it works under the hood or you’re building your own LayoutManager and want to know requirements, a good starting point could be this method documentation: supportsPredictiveItemAnimations().
Custom change Item animations
Change animation in DefaultItemAnimator plays cross-fade animation between pre and post state of item view. Base on example app we want to implement something more complex:
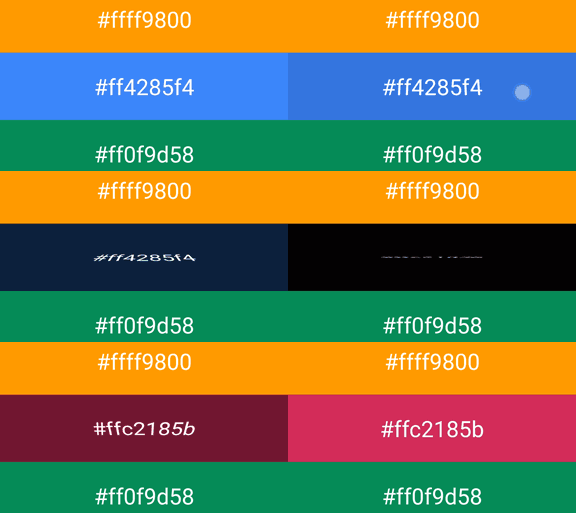
Our item should twist text from one to another value and background should animate its color in way: starting color -> black -> ending color. To achieve this we’ll extend DefaultItemAnimator.
Items animation under the hood
Change item animation is the simplest way to visualize how ItemAnimator works under the hood. It’s worth mentioning that there is no big difference between it and add or remove animations.
Here is the final implementation of MyItemAnimator (to see the whole picture of it).
1) Notify change
Ok then, let’s start from the beginning. Our list is displayed and our RecyclerView uses custom item animator (MyItemAnimator):

After we click on item this code is performed:
Starting from notifyItemChanged() method (which directly calls notifyItemRangeChanged(); with given clicked position and itemsCount = 1) we’re informing RecyclerView which item should be updated.
2) Record recent state
Now our animator starts recording recent view state by calling recordPreLayoutInformation(RecyclerView.State state, RecyclerView.ViewHolder viewHolder, int changeFlags, List payloads) (see documentation for more detailed description). In this method we have access to current ViewHolder of changed view. And this is the best place to save state (especially those properties which should be animated).
State can be saved in returned ItemHolderInfo object
This is our implementation of it:
Default ItemHolderInfo keeps data of view bounds. Additionally we need background color and text which will be animated.
recordPreLayoutInformation() collects data of all showed views, even if they are not changed (in this case param changeFlags is set to ViewHolder.FLAG_BOUND which equals 0).
Other flags values describe requested operation (change animation has value 2 - ViewHolder.FLAG_UPDATE).
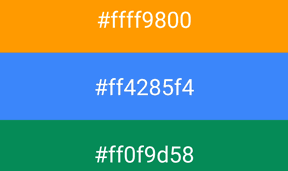
In this moment our view still looks like this:
3) Bind new view
Now our adapter is requested to bind ViewHolder to new item’s value (final state):
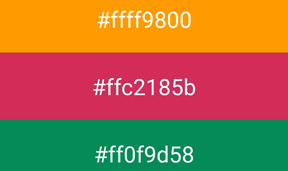
It means that in this step our view is changed and looks like here:
4) Record new state
Now go back to ItemAnimator. It’s time to record final state of our view by calling: recordPostLayoutInformation(RecyclerView.State state, RecyclerView.ViewHolder viewHolder) (see documentation for more details). Once again we have access to ViewHolder, but this time with a new view. Again we can save important details in ItemHolderInfo (our ColorTextInfo).
4) Play (or just prepare animation)
RecyclerView.ItemAnimator has a list of methods for animating different operations. In our case animateChange() will be called. And this is the best place to prepare our animation. We have 4 params helping with this:
RecyclerView.ViewHolder oldHolderRecyclerView.ViewHolder newHolderItemHolderInfo preInfoItemHolderInfo postInfo
oldHolder and newHolder objects represent our item before and after layout. In our case both are the same object because of:
It means that for animation we don’t need to have separated objects of ViewHolder (because we can handle it based only on ItemHolderInfo objects).
preInfo and postInfo objects came from recordPreLayoutInformation() and recordPostLayoutInformation().
As you know, our view is already bind to final state. All we have to do inside animateChange() method, is to set view to initial state (saved in preInfo) and prepare and optionally play animation to the final state.
Why optionally?
animateChange() method returns boolean which tells RecyclerView if our animation was already performed (false) or just set up, saved and waiting for performing (true).
In case of false flow ends. We only have to remember to tell RecyclerView when our animation is finished by calling dispatchAnimationFinished():
It will tell that ViewHolder is ready to reuse.
Otherwise (animateChange() returns true):
5) Play all pending animations
There is a chance that we have more than one animation needed to perform in one time (think about all shifts, appearances or disappearances in add/remove operations). In this case animate...() methods should save pending animations somehow (DefaultItemAnimator uses simple ArrayLists for this) and then play all of them together in: runPendingAnimations().
There are some additional steps (e.g. cancelling animation or animations) but I will leave you here to figure it out on your own.
Whole described flow in very short version looks like this:

Example app and source code
This project reproduces source code showed by Chet Haase and Yigit Boyar on talk: RecyclerView Animations and Behind the Scenes. It’s not official source code from Googlers but I believe it’s very similar.
It was not described here but our code can handle cases when user repeatedly clicks on view by canceling recent animation and playing new one from the time when previous was stopped. This also was presented in talk.
Here is the video showing our app:
Source code
Full source code of described project is available on Github repository.
Author
Miroslaw Stanek
Head of Mobile Development @ Azimo Money Transfer
If you liked this post, you can share it with your followers or follow me on Twitter!